4/26/12

Dining room chairs

Every once in awhile, you can find some amazing finds on Craigslist...such as these chairs!
 
Six mid-century dining chairs for $50. I've been wanting to add mid-century touches to our 1960s house, so these were a perfect find. They desperately need to be refinished and reupholstered, but they have such potential! Stay tuned for their makeovers...

4/24/12

Millie is 2!

My furry baby girl is 2 today! It's amazing to think what the world was like without Millie...maybe a little calmer, a little quieter, and with fewer teeth marks...However, it was not nearly as fun! Her birthday had many highlights including...

...a new toy


 ...a special dinner


...and a trip to the dog park


Happy birthday baby girl!


4/19/12

Dining room trim

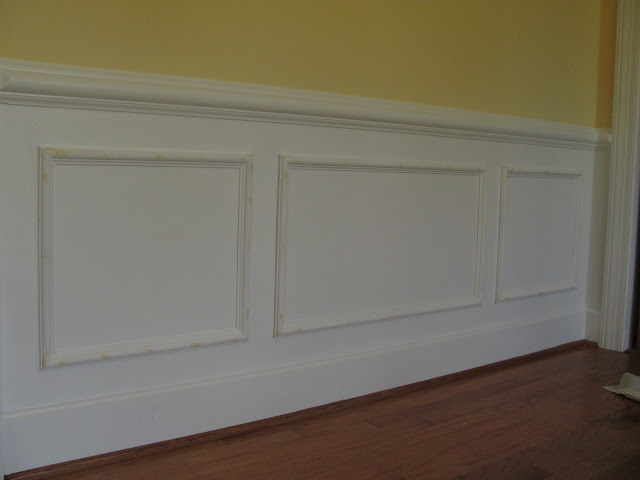
Our current project we're working on is installing trim in the dining room! When we painted the dining room (almost a year ago already, yikes!) we painted the area below the chair rail a glossy crisp white with the intention of putting picture frame molding underneath. Well, never mind how long it took to actual get around to installing the trim, but this weekend we finally started! Here's how we did it:

1.  First we had to measure and mark the boxes. We used a chalk line. 


2. Next we sanded and primed the trim.

3. Then my diligent husband had to learn how to miter corners-he got lots of practice. He cut the pieces to fit. This took lots of patience!

Notice our trusty assistant coming to check on the progress
Take a little more off that corner!
 4. He nailed the trim to the wall following the chalk lines, using a level. He used his awesome air compressor which made the job MUCH easier.


 5. We filled in the nail holes with wood filler and used paintable caulk around all the edges and corner joints.

 
6. Now all we have to do is paint 2 coats over the trim, and then we will finally be done with this project!

Here is the finished project!


Now all we have to do to finish the dining room is refinish the table and chairs, and hang artwork. We're almost done!


 See what a subtle difference the trim makes?
And if you remember the original dining room...


...there's no comparison.

4/17/12

Master Bath


Meet our over the top 1960s master bath. While I don't mind the aqua, it's too much. However, we wanted to maintain a 60s feel to the bath, it just needed to be toned down and updated. (Note the oddly placed medicine cabinet and light fixture)
Our very 1960s master bathroom.
Here's the beginning of the renovation

And here's the after (almost!)
Voila!
 Our new master bath redo!
It still needs some finishing touches, but it's almost there.

Welcome to my home...our entryway

This is my entryway initially...lots of wallpaper and wood trim.
 

After lots of wallpaper stripping, and many tedious coats of primer and paint, here's what we came up with


 A fresh coat of paint makes all the difference with the light fixture
After
Before


4/16/12

The gateway into my backyard...the Dining Room


Here is our original dining room. It needed a bit of work.
And work we did...


My wonderful family stripped wallpaper, primed, and painted.
Then we added a sliding door so I could have easy access to my beloved backyard!


Here's our helper, taking in the wonders of the sliding glass door.


 Oh yeah,  here is the mostly finished inside.

We still need to add a few finishing touches like picture frame molding under the chair rail, refinishing the dining set, and adding some artwork, but it came a long way!