Showing posts with label Home. Show all posts

1/30/14

The long awaited partial Ikea kitchen reveal

So the last update on our kitchen was this post when we had just purchased our cabinets from IKEA. Over the course of several months we turned this vision...

into this reality...


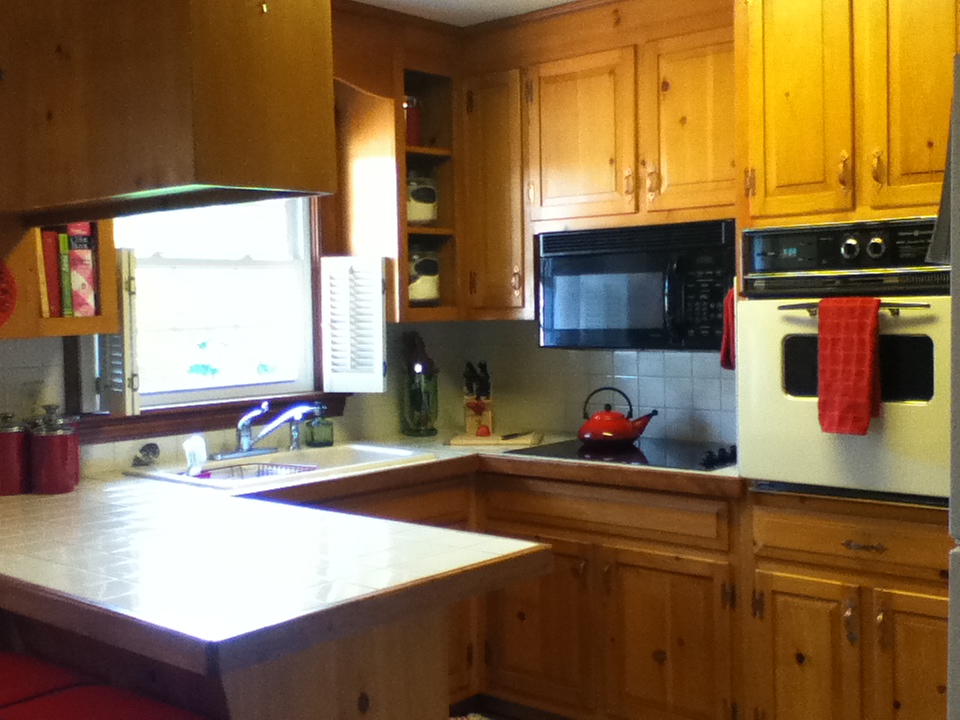
Remember the kitchen before the total reno?

In fact you can still see the remnants of the old kitchen on our ceiling (umm, imagine a sheepish grin). So yes, the kitchen has been mostly functional for a year now but we still have to decide how we're redoing the lighting and the ceiling. Ripping out the old cabinets left some not so pretty and not so easily covered marks so we're debating whether to hire somebody to refinish the ceiling with some ugly texture or maybe hide all the imperfections with tin tiles or planks. Hmm, you'll probably see the conclusion in a year or so.

I'll be posting more in depth on the kitchen renovation including how we customized our Ikea kitchen to our space.

Anyway, so what went into this renovation and what do we have left to do?

  • Demo (cabinets, tile, counter top, floor)
  • Install hardwood floors (to include the den)
  • Assemble and install cabinets
  • Install appliances
  • Install back splash
  • Put up open shelves
  • Trim (crown molding, baseboards, etc.)
  • Paint
  • Window treatments
  • Fix ceiling
  • Install light fixtures
  • Accessorize (to include a message boards, possible gallery wall, trash/recycling)

Aww, this makes it look like we have more to do than I thought. 

6/3/12

Kitchen plans

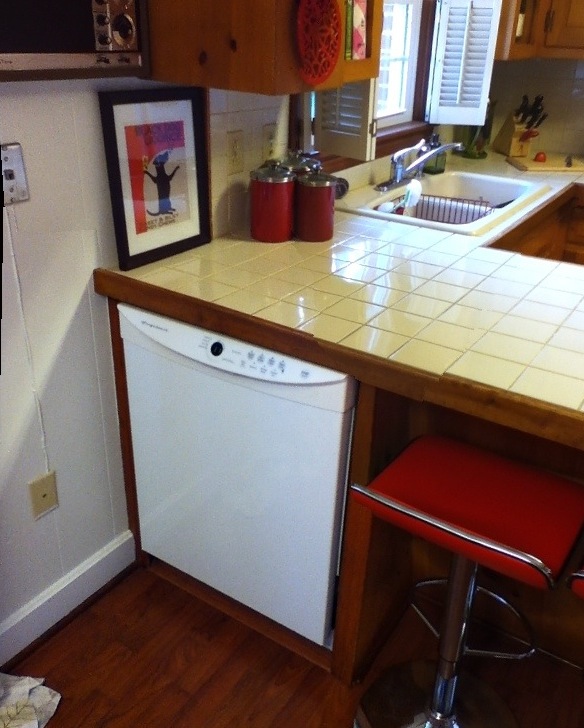
Lately I've been dreaming how to redo the kitchen. Right now ours needs lots of updating. (Sorry about the pictures-I forgot my camera at my parents' house and had to use my Ipod.)
While our kitchen does meet all of our needs, it is very awkward. For example...
...the dishwasher opens up into the den (I wonder who thought of that?)
  ...there are odd little gaps in between some of the cabinets
...and narrow little pathways.
Needless to say, we've been wanting to do a renovation to expand the space and improve its function. There are two options. We can keep much of the current layout and just smooth out the awkward areas, or do a complete demo and start from scratch. While pondering what to do, I started playing around with Ikea's kitchen planner tool-very cool!
The first plan has the fewest changes.
Imagine the back wall to be the same as it is now (hard to see, but the empty place on the right by the doorway is where the oven would go, the empty spot on the left is for the microwave, and below that is the cook top). Notice the peninsula is gone, the dishwasher moves into the kitchen (yay!), and we get double our pantry space (behind the fridge).  These cabinets would reach the ceiling.
With this option, the only new cabinets would be the base cabinet in front of the dishwasher, the two upper wall cabinets above that base cabinet and the dw (or we could also use open shelves for a much simpler but cleaner look), and a pantry cabinet to match the one we already have. We would hope to build our own cabinets to match our existing ones (are we shooting for the stars???). I found some instructions on making your own cove raised panel kitchen cabinet doors online which look exactly like our current doors. So with this plan we need to:
  • Build a few cabinets as mentioned above
  • Put down oak hardwood floors to match the rest of the house (which we'd also extend into the den)
  • Install new countertops such as this
  • Put up a new backsplash (maybe a classic white subway?)
  • Paint the walls
  • Install a new light
  • Buy a new refrigerator/freezer and dishwasher
I came up with another 2 plans that involve complete demos. Here is the first.
This one triples our pantry space and mitigates the fridge's awkward placement. This plan requires all new cabinets as well as appliances. We need to replace our fridge and dishwasher anyway, but this plan uses a range versus an oven and cooktop. That allows us a little more counterspace by the stove. Here are the other views.
And finally, if the fridge doesn't fit by the dishwasher, then this is the second option.
This plan also requires a complete renovation. It is more of a combination of the first two, but this option has the most counterspace (still not a lot though). Here is the back view.
This plan doubles our current pantry space like the first plan.

The Ikea tool also creates a shopping list and total cost of what you need to buy there! The costs weren't as bad as I thought for all new cabinets, counter, and appliances (the second plan was $4,736.70 and the third was $4,674.68-of course this does NOT take into account the floors, lighting, paint, tile, etc. It does however include cabinets, countertops, hardware, sink, and appliances).

So what do you think? Any preferences or ideas?

4/19/12

Dining room trim

Our current project we're working on is installing trim in the dining room! When we painted the dining room (almost a year ago already, yikes!) we painted the area below the chair rail a glossy crisp white with the intention of putting picture frame molding underneath. Well, never mind how long it took to actual get around to installing the trim, but this weekend we finally started! Here's how we did it:

1.  First we had to measure and mark the boxes. We used a chalk line. 


2. Next we sanded and primed the trim.

3. Then my diligent husband had to learn how to miter corners-he got lots of practice. He cut the pieces to fit. This took lots of patience!

Notice our trusty assistant coming to check on the progress
Take a little more off that corner!
 4. He nailed the trim to the wall following the chalk lines, using a level. He used his awesome air compressor which made the job MUCH easier.


 5. We filled in the nail holes with wood filler and used paintable caulk around all the edges and corner joints.

 
6. Now all we have to do is paint 2 coats over the trim, and then we will finally be done with this project!

Here is the finished project!


Now all we have to do to finish the dining room is refinish the table and chairs, and hang artwork. We're almost done!


 See what a subtle difference the trim makes?
And if you remember the original dining room...


...there's no comparison.

4/17/12

Master Bath


Meet our over the top 1960s master bath. While I don't mind the aqua, it's too much. However, we wanted to maintain a 60s feel to the bath, it just needed to be toned down and updated. (Note the oddly placed medicine cabinet and light fixture)
Our very 1960s master bathroom.
Here's the beginning of the renovation

And here's the after (almost!)
Voila!
 Our new master bath redo!
It still needs some finishing touches, but it's almost there.

Welcome to my home...our entryway

This is my entryway initially...lots of wallpaper and wood trim.
 

After lots of wallpaper stripping, and many tedious coats of primer and paint, here's what we came up with


 A fresh coat of paint makes all the difference with the light fixture
After
Before


4/16/12

The gateway into my backyard...the Dining Room


Here is our original dining room. It needed a bit of work.
And work we did...


My wonderful family stripped wallpaper, primed, and painted.
Then we added a sliding door so I could have easy access to my beloved backyard!


Here's our helper, taking in the wonders of the sliding glass door.


 Oh yeah,  here is the mostly finished inside.

We still need to add a few finishing touches like picture frame molding under the chair rail, refinishing the dining set, and adding some artwork, but it came a long way!