6/3/12

Kitchen plans

Lately I've been dreaming how to redo the kitchen. Right now ours needs lots of updating. (Sorry about the pictures-I forgot my camera at my parents' house and had to use my Ipod.)
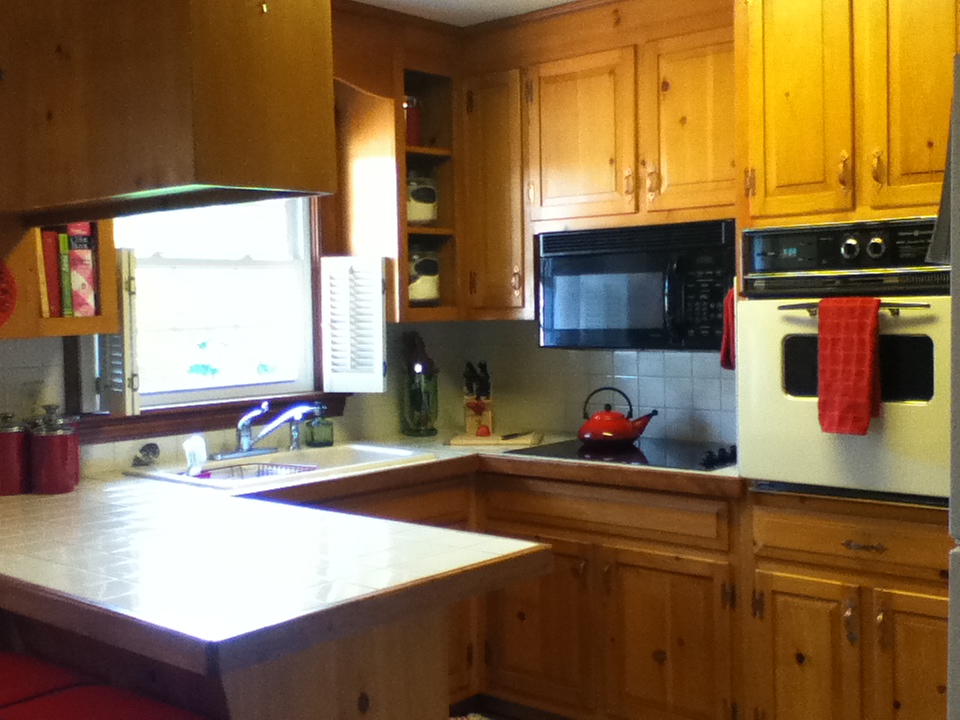
While our kitchen does meet all of our needs, it is very awkward. For example...
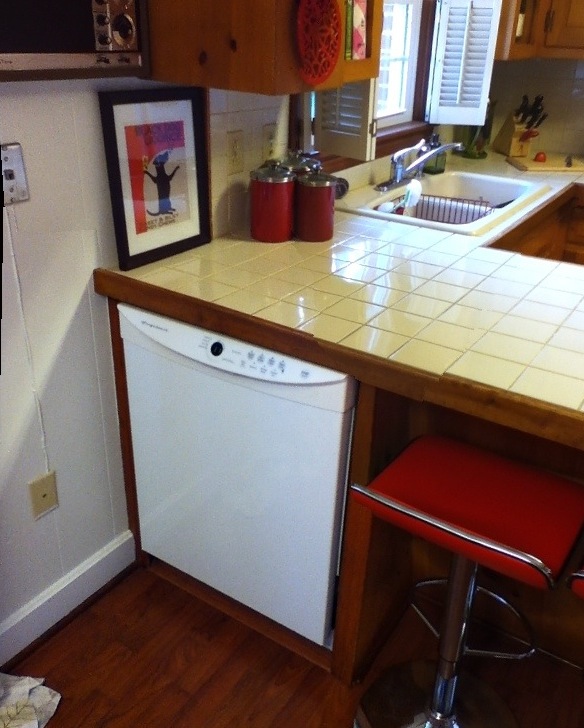
...the dishwasher opens up into the den (I wonder who thought of that?)
  ...there are odd little gaps in between some of the cabinets
...and narrow little pathways.
Needless to say, we've been wanting to do a renovation to expand the space and improve its function. There are two options. We can keep much of the current layout and just smooth out the awkward areas, or do a complete demo and start from scratch. While pondering what to do, I started playing around with Ikea's kitchen planner tool-very cool!
The first plan has the fewest changes.
Imagine the back wall to be the same as it is now (hard to see, but the empty place on the right by the doorway is where the oven would go, the empty spot on the left is for the microwave, and below that is the cook top). Notice the peninsula is gone, the dishwasher moves into the kitchen (yay!), and we get double our pantry space (behind the fridge).  These cabinets would reach the ceiling.
With this option, the only new cabinets would be the base cabinet in front of the dishwasher, the two upper wall cabinets above that base cabinet and the dw (or we could also use open shelves for a much simpler but cleaner look), and a pantry cabinet to match the one we already have. We would hope to build our own cabinets to match our existing ones (are we shooting for the stars???). I found some instructions on making your own cove raised panel kitchen cabinet doors online which look exactly like our current doors. So with this plan we need to:
  • Build a few cabinets as mentioned above
  • Put down oak hardwood floors to match the rest of the house (which we'd also extend into the den)
  • Install new countertops such as this
  • Put up a new backsplash (maybe a classic white subway?)
  • Paint the walls
  • Install a new light
  • Buy a new refrigerator/freezer and dishwasher
I came up with another 2 plans that involve complete demos. Here is the first.
This one triples our pantry space and mitigates the fridge's awkward placement. This plan requires all new cabinets as well as appliances. We need to replace our fridge and dishwasher anyway, but this plan uses a range versus an oven and cooktop. That allows us a little more counterspace by the stove. Here are the other views.
And finally, if the fridge doesn't fit by the dishwasher, then this is the second option.
This plan also requires a complete renovation. It is more of a combination of the first two, but this option has the most counterspace (still not a lot though). Here is the back view.
This plan doubles our current pantry space like the first plan.

The Ikea tool also creates a shopping list and total cost of what you need to buy there! The costs weren't as bad as I thought for all new cabinets, counter, and appliances (the second plan was $4,736.70 and the third was $4,674.68-of course this does NOT take into account the floors, lighting, paint, tile, etc. It does however include cabinets, countertops, hardware, sink, and appliances).

So what do you think? Any preferences or ideas?

5/19/12

Mid-Century Nightstands

So I've been looking for 2 matching nightstands in thrift stores and Craigslist for a long time now with no success. But when I went antiquing with my sister I found a pair of mid-century nightstands!
They were in great condition and solid wood, just an ugly blonde color with even uglier hardware. They begged to be refinished. Here's what we've done so far...
  • I removed all the hardware which just included the drawer pull and the little metal cap thingies on the tips of the legs.
  • I sanded using an electric palm sander for the flat surfaces and by hand on the other areas. This was very important to get all that shiny finish off.
  • I covered up the areas I didn't want sprayed using newspaper and painters tape. Really these areas would have been hidden, but now I know that underneath the drawer lies a clean untouched surface!


  • Then it was time to prime!


I did two coats of primer. Now they are just sitting in the shed waiting for their final coats of paint and new hardware. Should we paint them a crisp clean white or a fun bright color? And what should the hardware look like? These unanswered questions are the main reasons they still sit, waiting eagerly for their final touches...stay tuned!

5/15/12

House Tour

Check out the new House Tour page I added (still a work in progress!).

5/7/12

Dining room chair plans

You know those desperately-in-need-of-a-makeover dining room chairs I bought a couple of weeks ago?


Well we have some plans in the works. Here's a sample of the Premier Prints fabric I'm eagerly waiting to arrive:

Fabric Guru.com

When it arrives I think we'll just reupholster for now; we'll make the decision about refinishing later. Stay tuned!

4/26/12

Dining room chairs

Every once in awhile, you can find some amazing finds on Craigslist...such as these chairs!
 
Six mid-century dining chairs for $50. I've been wanting to add mid-century touches to our 1960s house, so these were a perfect find. They desperately need to be refinished and reupholstered, but they have such potential! Stay tuned for their makeovers...

4/24/12

Millie is 2!

My furry baby girl is 2 today! It's amazing to think what the world was like without Millie...maybe a little calmer, a little quieter, and with fewer teeth marks...However, it was not nearly as fun! Her birthday had many highlights including...

...a new toy


 ...a special dinner


...and a trip to the dog park


Happy birthday baby girl!


4/19/12

Dining room trim

Our current project we're working on is installing trim in the dining room! When we painted the dining room (almost a year ago already, yikes!) we painted the area below the chair rail a glossy crisp white with the intention of putting picture frame molding underneath. Well, never mind how long it took to actual get around to installing the trim, but this weekend we finally started! Here's how we did it:

1.  First we had to measure and mark the boxes. We used a chalk line. 


2. Next we sanded and primed the trim.

3. Then my diligent husband had to learn how to miter corners-he got lots of practice. He cut the pieces to fit. This took lots of patience!

Notice our trusty assistant coming to check on the progress
Take a little more off that corner!
 4. He nailed the trim to the wall following the chalk lines, using a level. He used his awesome air compressor which made the job MUCH easier.


 5. We filled in the nail holes with wood filler and used paintable caulk around all the edges and corner joints.

 
6. Now all we have to do is paint 2 coats over the trim, and then we will finally be done with this project!

Here is the finished project!


Now all we have to do to finish the dining room is refinish the table and chairs, and hang artwork. We're almost done!


 See what a subtle difference the trim makes?
And if you remember the original dining room...


...there's no comparison.