So it seems I never really took a Before living room picture, probably because it was never really clean enough or whatever and honestly I didn't think we'd be getting around to decorating it for awhile. It was a room I just couldn't envision and had no idea how to arrange. However, we came one big step closer to the makeover when we got to replace this

with this

Now we were free from the big pain in the neck major project of refinishing and REUPHOLSTERING our original couch that we got for free with the house. I've learned that if something needs to be reupholstered in our house, it's going to sit in some dark corner forgotten for years. Remember this chair? That stayed half finished for 2 1/2 years, and that was nowhere near the enormity of a sofa. And before we could even get started on the sofa project we had many decisions to make. Would we paint or stain the frame? What fabric? 1, 2, or 3 cushions? Keep or ditch the tufting? I don't know about you, but for some reason it takes us forever to make decisions. Our new presentable couch sat in our practically untouched living room for several more months. Then suddenly one day I woke up and said, "I'm going to paint the living room." So I did. I didn't even procrastinate a minute more to take decent Before pictures.

Our original walls were a streaky yellowish beige. I think the previous homeowners hurridly slapped some neutral paint over the bright mint they had before. The walls also had several spackling patches from an attempt to fill in nail holes.
First I had to degloss, sand, and prime the trim, a process I loathe. Maybe it's because we had so much glossy wood trim throughout the house, but I'm over it.


Next I had to prep the walls for painting. This included 1. taking the outlet covers off (revealing remnants of the original mint paint (and yes, the outlets themselves received their own coat of hurridly slapped on paint)

2. filling in more nail holes and wall cracks,

and 3. edging.

Finally I got to do the fun part of rolling on the paint!

All in all, it took me about 2 days and almost the entire 5th Harry Potter audiobook Order of the Phoenix to complete the room. But it looks soooooo much fresher!
Next came the process of arranging the room. I tackled this with great help from my sister. We tried a few different arrangments. I liked this arrangment, but it felt like it was closed off from the front door plus there really wasn't a good place for the television.

This arrangement had more potential (it's hard to imagine though with this cluttered picture!).

But it still looked empty in the space around the window. So we dragged in the white Target bookcases from the office...

But these looked too dinky. I loved the look of these from The Home Project. It's amazing how much bigger the built-in bookcases made the room look!
Beautiful as these were, I wanted something easier. Who knows how many years it would have taken to build our own bookcases! I searched some more blogs and saw these from The Brick House

How cute and industrial are those? Then I saw these, also from The Brick House

These were exactly what I needed-simple, quick, and inexpensive. So we ran out to Lowes to the closet section and lumber section and got everything we needed. Here they are natural and unstained.

And here they are finished

And here they are with stuff on them

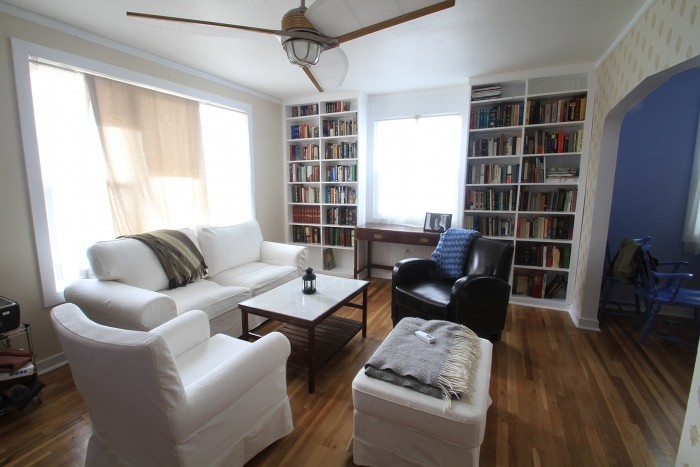
The nice thing is we can rearrange them on a whim, great for indecisive people. So after hanging some art (more on that later) and tweaking the arrangement the living room is finished almost finished!


There is even a surprise behind the tapestry...

...the ugly television!
So we still have some final details to address, but it has come a long way!
No comments:
Post a Comment